

Getting the Police Clearance Certificate (PCC) from your home country is a crucial step to applying for Permanent Residency (PR). Besides, you also need PCC from any country where you have lived for 6 months or longer. Since this process takes such a long time (around 2-5 weeks), many aspiring applicants start preparing for it beforehand.
The PCC is usually valid for 6 months since it is provided. So the PCC you came to Canada with is not usually valid anymore at the time of your PR application.
Being from Bangladesh, I had to get my PCC from there. Even though it is easy to get by creating an account and applying online on their website, the additional documents required to apply from outside Bangladesh made the process much longer.
Since I couldn’t find a properly detailed description online to help me throughout this process and I struggled to piece together how to do any of these properly, I am here to share the steps I took with newer applicants like you!

The following are the steps I took to get my PCC from Bangladesh, along with the corresponding dates I took those steps.
1. Submit online application to Bangladesh Consulate in Toronto/Ottawa (December 25, 2024)
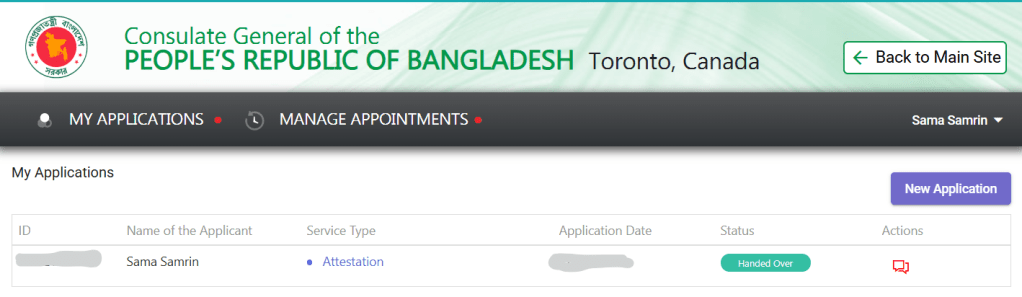
Go to the Consulate General of Bangladesh in Toronto website and create an account there (Alternatively you can go for High Commission of Bangladesh in Ottawa website). Click on “New Application” to start your attestation process.
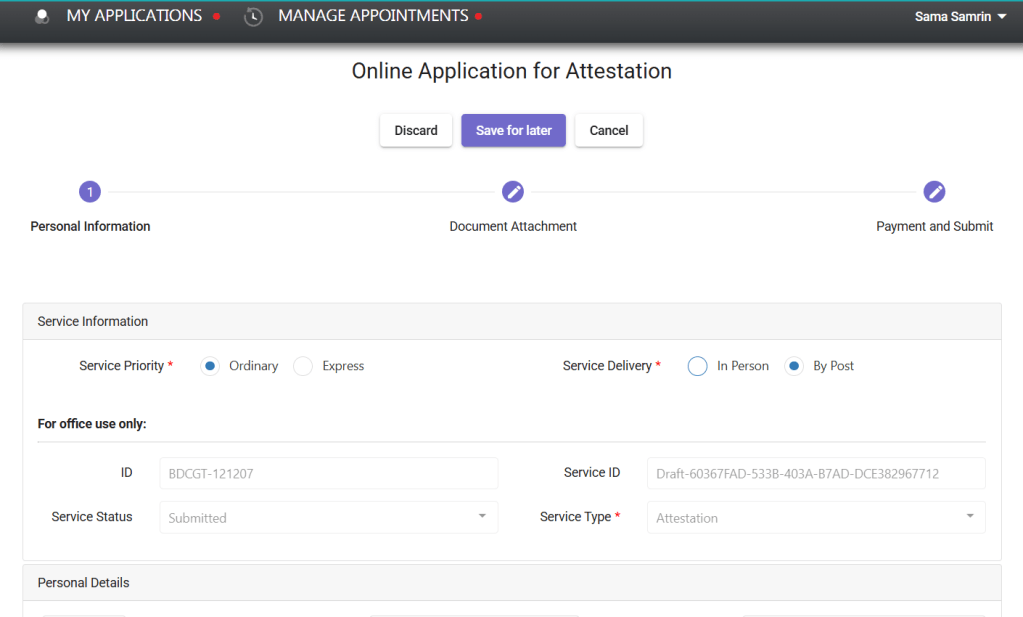
You have to submit a few documents and pay the fee according to what speed of service you need. The term for it is “service priority”. The “ordinary” service fee is $25 and the “express” service fee is $40.

You can learn about the detailed process of getting the attested documents from the Consulate on their website.
2. Mail docs to the Consulate for attestation (January 11th, 2025)
I mailed the required documents to the Bangladesh Consulate of Toronto using XpressPost envelopes. One of the envelopes is to send the documents to the Consulate and the other one is for them to send back the attested documents to me.
On the first envelope I wrote two addresses (To: the consulate address, From: my address). On the second envelope, I wrote only one address (To: my address). This second envelope will be used by the Consulate to mail back my documents.
In addition to the return envelope and my original passport, I also included the following documents inside the first envelope:
- Online payment proof (I just printed the email I got confirming my payment on the Toronto Consulate website)
- Application confirmation doc (signed by you. This signature should match the signature on your passport)
- Authorization letter (signed by you. This letter gives your chosen person in Bangladesh the authority to pick up your PCC on your behalf. For instance, I gave the NID and the name of my father in my authorization letter)
- Passport photocopy
- NID photocopy
- One photo of mine (45×35 mm)
3. Consulate’s attestation & Tracking mails (January 15th, 2025)
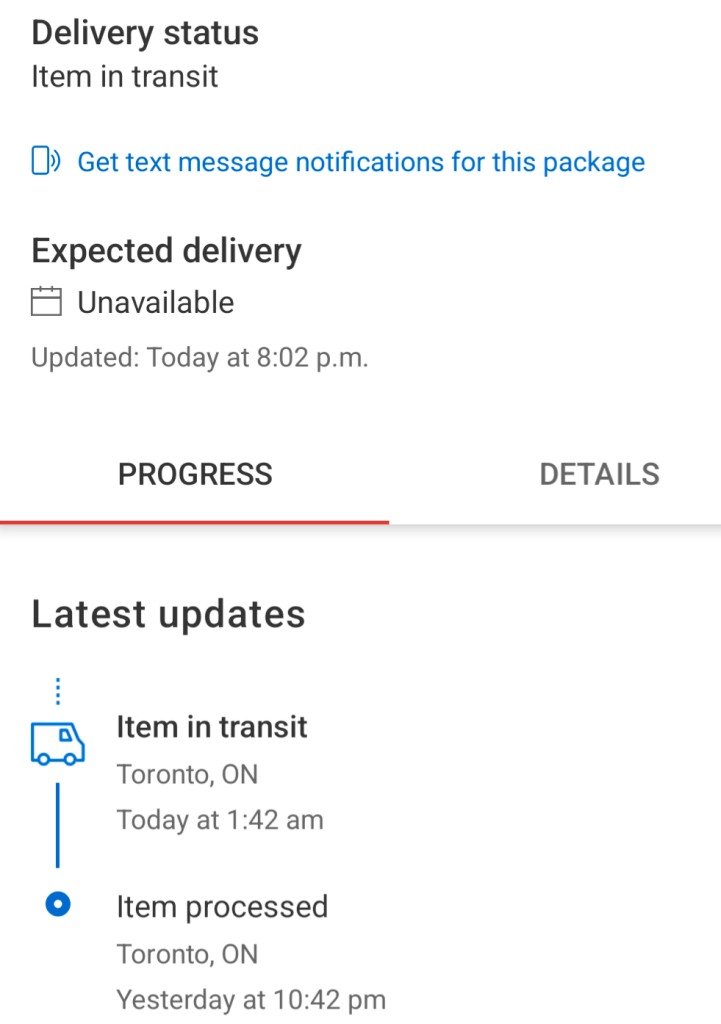
I used the Canada Post app to track both of my envelopes. To do so, I had scanned the barcode available on each envelope with the app. Doing so automatically added their tracking numbers to the “Track Mail” tab of the app.
My mail with the documents was delivered to the Consulate on January 15th.
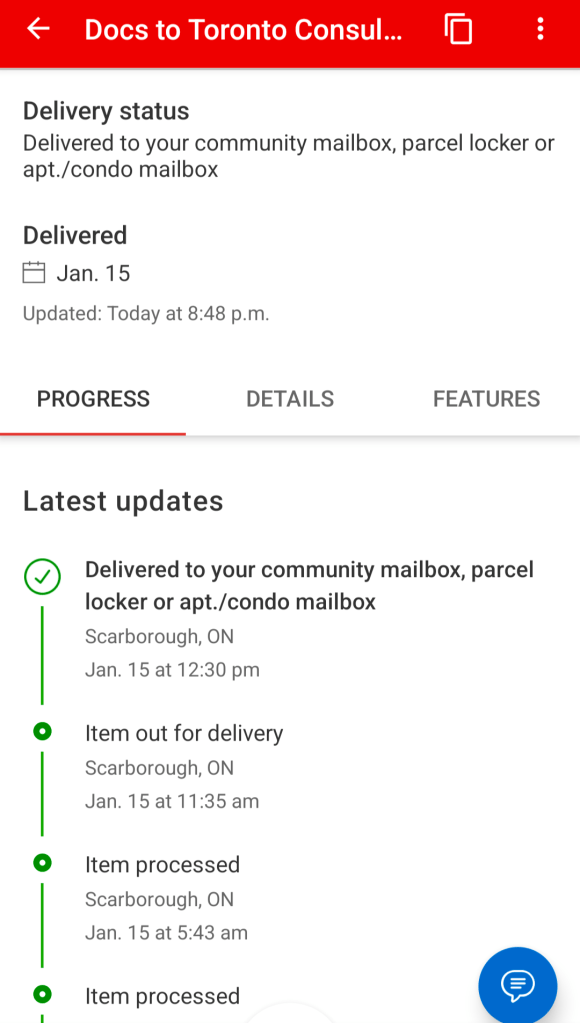
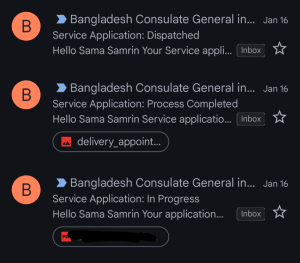
The next day, I got three emails from the Consulate confirming that they’re done with my attestation.
And the day after that (January 17th), my tracked envelope for the return mail got activated. I saw on my app that it was processed and in transit from Toronto.
4. Receive attested docs from Consulate (January 20th, 2025)
I had scanned my return envelope before inserting it into the envelope I sent to the Consulate. So I had its tracking number to apply on the Canada Post app and could keep an eye on how far it is from getting delivered.
Since I used the XpressPost envelope, it got processed and delivered pretty fast, as you can see from the screenshot below.
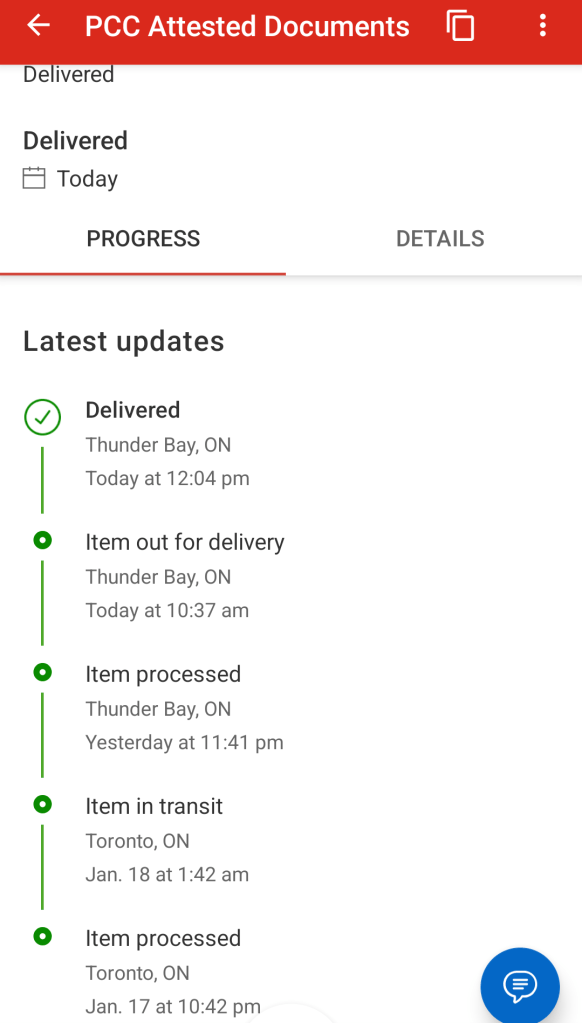
Inside the envelope, there was my passport, two attested copies of the passport bio page, and the attested authorization letter.
5. Submit PCC application on Bangladesh Police Website (January 20th, 2025)
After I scanned the attested documents I got from the Consulate, I used those images and other essential attested documents from my previous application, to submit my new online PCC application on the Bangladesh PCC portal.
I paid the fee for the application (500 taka or 5-6 CAD) with my credit card. It generated a chalan copy from Sonali Bank, which I saved as a PDF for future use.
After that, the application went through the following stages:
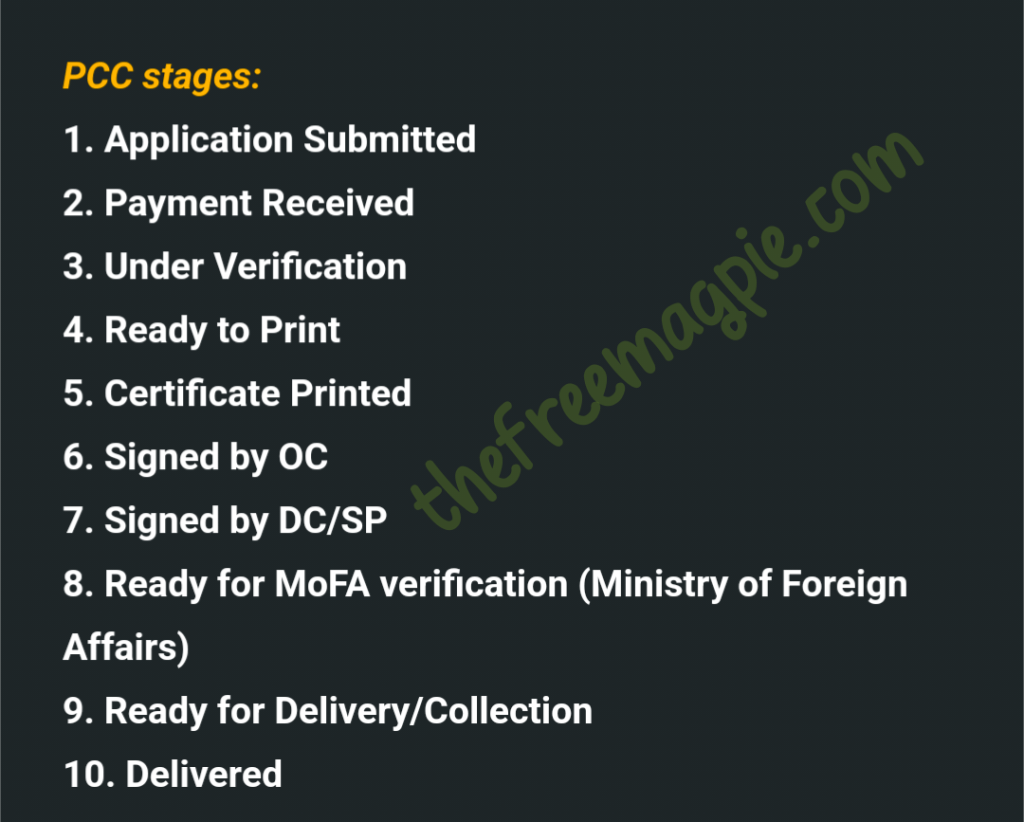
6. PCC approved (January 30, 2025)
My PCC was finally approved on January 30th. I checked the status on the police.gov.bd portal and informed my father (the authorized person) immediately.
7. Authorized person picks up and scans the PCC (January 31, 2025)
My father was very proactive about the whole thing. He called the police office as soon as he could and picked up the certificate. Then he scanned it with CamScanner and emailed me several copies of it.
That is the PCC scanned image that I will be using for my PR application, when the time comes.
If you come across any question related to this process, you can leave it in the comments. I will try my best to help you with relevant information.
Best of luck and may we all accomplish our goals!
Discover more from The Free Magpie
Subscribe to get the latest posts sent to your email.

